Don't you just adore summer peaches?


This is almost not a recipe, since all I really did was slice some beautiful produce from the farm stand down the road.  I have a feeling I'll be visiting that farm stand verrry frequently.  It's conveniently located across from the library, and with my summer habit of devouring books {and peaches}, that's my go-to corner this summer.  Peaches and fiction, ahhh.


Do yourself a favor and invest in some spectacular balsamic vinegar for all your salads this summer.  This one is a glaze I found at Whole Foods, and I use it on caprese type salads, because it's thicker and easier to make designs with over the salad.  But I'm also a huge fan of the Olive This balsamic that's been aged 20 years.  The longer it's been aged, the less acidic.  Meaning, I would eat that stuff with a spoon.


Watch out, peach paparazzi!  And y'all, I was taken in by a beautiful basil plant at Trader Joe's the other day.  Only $4!!  So now we have fresh basil.  At least, until I possibly accidentally kill it by being out of town for a week and leaving it in the blistering sun.  Oops.  But I'm optimistic.  {As long as none of you saw what happened to my herbs last summer.  They were more like dried herbs in a pot.}

Peach Caprese Salad
Serves 2

2 large peaches
2 large tomatoes
1 handful fresh basil
About 1-2 tablespoons balsamic vinegar {or glaze}
Salt & Pepper to taste

Skin and slice the peaches, and slice the tomatoes.  Salt and pepper both.  Slice the basil into strips {or tear it for that rustic feel}, and layer tomatoes, peaches, and basil.  Sprinkle balsamic over the plate of peaches, tomatoes, and basil.  Voila!


Someone please remind me to water that basil plant.


I leave water cups just... everywhere.


Seriously, if I come to your house, assign me a cup with a specific design, otherwise I will use a cup, completely forget where/what it is, and get a new one.  {Sorry in advance} It's one of my mother's favorite features about me. {HA.}  And afterwards, I feel guilty about the 8 water cups I went through in a three hour period.  But I'm always too confused {ashamed} to clarify where my cup is just to find out that my conscientious host has already put it in the dishwasher.


But for why am I telling you this?  To demonstrate that if I, lazy-water-cup-leaver, will stand in one place {at the stove} focusing on one activity {stirring} for twenty minutes, this risotto MUST be worth it. {And yes, Mr. S&S has assigned me a particular cup so that I stop just leaving them everywhere}


Also, let's just get real for a minute.  Mr. S&S's real name is Nick.  Surprise!  Typing Mr. S&S is awkward, and I'm done with it. He's probably glad to have his real name back, too.


Ok, back to risotto.  Y'ALL.  If you've never made risotto, it can be a pain in the butt.  However, it is probably Nick's number one requested meal, for very good reason.  Rice is slow cooked in shallots, wine, butter, chicken stock, and then made extra creamy with my secret ingredient {cream cheese!}.  It also serves as a beautiful, creamy base for veggies and, ahem, more cheese.


It's totally worth standing in one place for twenty minutes.  Plus you can count vigorous stirring as a bicep workout, which totally negates the calories in this recipe.  Promise.

Creamy Sweet Potato Risotto (with Chicken)
Serves 4 as a main dish, 8 as a side dish

1 1/2 cups arborio rice
3/4 cup white wine
1 shallot, minced
1 clove of garlic, minced
3 tablespoons butter
6 cups chicken stock (good quality, I also use a 1-2 cups of water instead of all stock)
2 sweet potatoes
2 chicken breasts
1 lemon, zested and juiced
1-2 oz cream cheese
1/4 cup parmesan, plus more for topping

Preheat the oven to 400 degrees.  Wrap the sweet potatoes in aluminum foil and allow them to bake for 1 hour.  Slice the chicken breasts into 1 inch thick pieces (our chicken breasts come super thick, but this might not be an issue for you) and sprinkle with salt and pepper.  These will cook for about 25 minutes.

Meanwhile, melt the butter in a large pot and warm the chicken stock in a separate pot.  When butter is melted, add in minced shallot and garlic and let saute until very fragrant (about 1 minute).  Then pour in uncooked rice.  Stir around in the butter/shallot/garlic mixture until rice is well coated.  Pour in wine and stir until the wine has evaporated/ been absorbed by the rice.  Then add two ladles of warm stock.  Stir continuously until the rice absorbs the stock.  Add another ladle of stock and repeat.  Make sure to stir and let the rice absorb the stock between each ladle.

After the rice has absorbed almost all the stock, taste to make sure the rice is al dente.  If it needs more stock, keep going, if not you're finished with the stock (I usually end up using somewhere around 5 cups).  After sweet potatoes are cooked, peel off skins, gently mash and add to rice.  Then add about 1/2 teaspoon of lemon juice and 2 tablespoons of lemon juice and incorporate.  Chop the cooked chicken into bite sized pieces and add to the rice.  Finally, add the cream cheese and parmesan and stir until it's all melted and distributed.  Serve with a squeeze of lemon and some parmesan on top!


And now we wait 3 months for me to remember to make risotto again.  Sorry, Nick.


Ooh, we'll get to these.


But first, a story.  A story of a Southern girl, some black ice, and a head trauma.  See, I realize that it was pretty quiet on the blog front the latter half of last week, and I feel I must explain.  Wednesday morning, my good friend, Tal, and I were leaving the library on campus.  Chatting and walking, we turned onto the sidewalk to our class building and WHOOSH {POW! KAZAM!} both of us completely flew up in the air and landed in heaps on the ground {thank you giant ice patch}.  Poor Tal had just gotten a full cup of coffee and now he was bathing in it.  I managed to hit both my left hip and right knee {still can't picture how}.  Embarrassed and confused, we jumped up to see about 20 undergrads staring at us open-mouthed.  We hobbled off to class, only to be sent by our professor to Student Health to get checked out.  And good thing we did: I apparently had jostled my brain enough to get a concussion.  So here I am, five full days later and finally allowed to look at a computer and read.  Obviously, the first thing I read was my latest Bon Appetit, and I just had to make these sweet potato fries.


It was a personal challenge.  Both to make food with my shaken brain, and because I have roasted sweet potatoes every way I can think of, and they never really get that french fry essence {which I would like all of my food to have, just to clear that up}.


Plus, these get dipped in a lime sour cream sauce.  It was supposed to be lime mayo, but someone in this house has a distinct mayo aversion.  {ahem, not me, I am pro-fat. especially on bread with tomatoes}  Still a fantastical sauce.  And feel free to use mayo for yourself. {Then invite me over pleaseandthankyou}

Why don't I just fry the sweet potatoes?  Good question.  Because I am afraid of frying things in my own home.  Not afraid of the process {although, let's face it, I got a concussion just from walking, let's not put me and boiling hot oil near each other any time soon}, more afraid of the pandora's box that would most assuredly open. But these fries {almost} eliminate that need: that are completely tasty and very easy!


Baked Sweet Potato Fries with Lime Sour Cream Dipping Sauce
Serves 2-4 as a side dish

3 medium size potatoes
2 tablespoons canola oil
Salt and pepper
1/3 cup sour cream (or mayo)
2 tablespoons lime juice
1/4 teaspoon lime zest

Preheat the oven to 450 degrees. Peel the sweet potatoes and slice longways into wedges, about 8-10 wedges per potato. Toss in oil, sprinkle with salt and pepper, and place on a foil-lined baking sheet and into the oven for 25-35 minutes, until potatoes are cooked through and getting just a bit crispy. Meanwhile, mix sour cream with lime juice and zest. Serve hot!

And watch out for that ice, man.


Y'ALL.


I don't even know how to begin about these.  They make me so irrationally happy.  Photographing them was a journey of cute deliciousness.  Honestly, I was trying to come up with an interesting, fun Superbowl recipe.  Something a little more substantial than the world's most awesome salsa, but not so difficult that the ingredient list or amount of steps would be prohibitive.  And what happened far exceeded my expectations, both in flavor and in adorable-ness.


Now, I know the Superbowl is not about cute {that's why we have the puppybowl}, but these mac & cheese cupcakes just make me smile.  That's why I am hopinghopinghoping that you haven't already picked out your contribution to a Superbowl party.  Because these need to be made.  And even though so many things conspired against me with this recipe {forgot to buy macaroni until I was in the grocery store parking lot, cut my finger on the crazy-sharp food processor slicer blade, made infuriating mess of cheese everywhere while tending to finger} I would still do it all over again for these fabulous, cheesy treats.


Ok, see those cupcake liners in that picture?  Disregard them.  I tried with and without the liners, and liners just pulled mac & cheese off and made the cupcakes very difficult {and disastrously messy} to eat.  If you allow the cupcakes to sit in the pan for 5-10 minutes after pulling them out of the oven, they will hold their delightful cupcake shape just fine.


{Sorry to the woefully under-filled cupcake up there.  I was down a finger.} Also, please don't be frightened by the jalapeno ring on top.  It's mostly for color, but also to indicate the bitsy of cayenne that is mixed in.  There's just a hint of kick, but the predominant flavor is definitely cheese.  And no butter!  It's practically health food.

Just make these.  The Superbowl needs them.

Mac & Cheese Cupcakes
Makes 18 cupcakes

12oz cooked elbow macaroni (I cooked 1lb and am using the rest for pasta salad lata)
3/4 cup cottage cheese
1/3 cup sour cream
1/4 teaspoon cayenne powder
2 tablespoons flour
A pinch of both salt and pepper
1 1/2 cup sharp cheddar cheese, shredded
1 1/2 cup monterey jack cheese, shredded
1/4 cup parmesan, for sprinkling on top
1 jalapeno, sliced into thin rings

Preheat the oven to 350 and spray a muffin tin with pam.  Place cottage cheese, sour cream, cayenne, flour, and s&p into a large bowl and whisk vigorously.  You're looking to whisk out the cottage cheese lumps so that the mixture is mostly creamy.  Mix in the cooked macaroni, and then stir in the cheddar and monterey jack cheeses.  Combine until all the macaroni is coated.

Scoop the mixture into the muffin tin, filling just up to the top.  The sprinkle parmesan on each cupcake and top with a jalapeno ring.  Bake for 25 minutes until the parmesan begins to brown.  Then pull out of the oven and allow to sit for 5-10 minutes until you remove them.

They also taste great at room temperature.  Just in case you were wondering.


Did I mention I'm lactose intolerant?  Let's just all continue to live in denial about that, mmk?


On this blogging journey, I've already learned so much.  Playing with templates, figuring out aggregate websites, developing my photography, and best of all- creating recipes!  As I twirl around the kitchen in search of the perfect spice or addition to a dish, I smile to myself.  This is joy.


What has been a challenge is figuring out how to convey to you the beauty of these recipes.  I work/go to school during the day, which means that when I'm cooking and photographing, there's no natural light!  So tonight's journey was not just in perfecting a recipe, but playing with photography and lighting.  Therefore, our before and after shoot.  With brussels sprouts.  Which is totally normal, right?


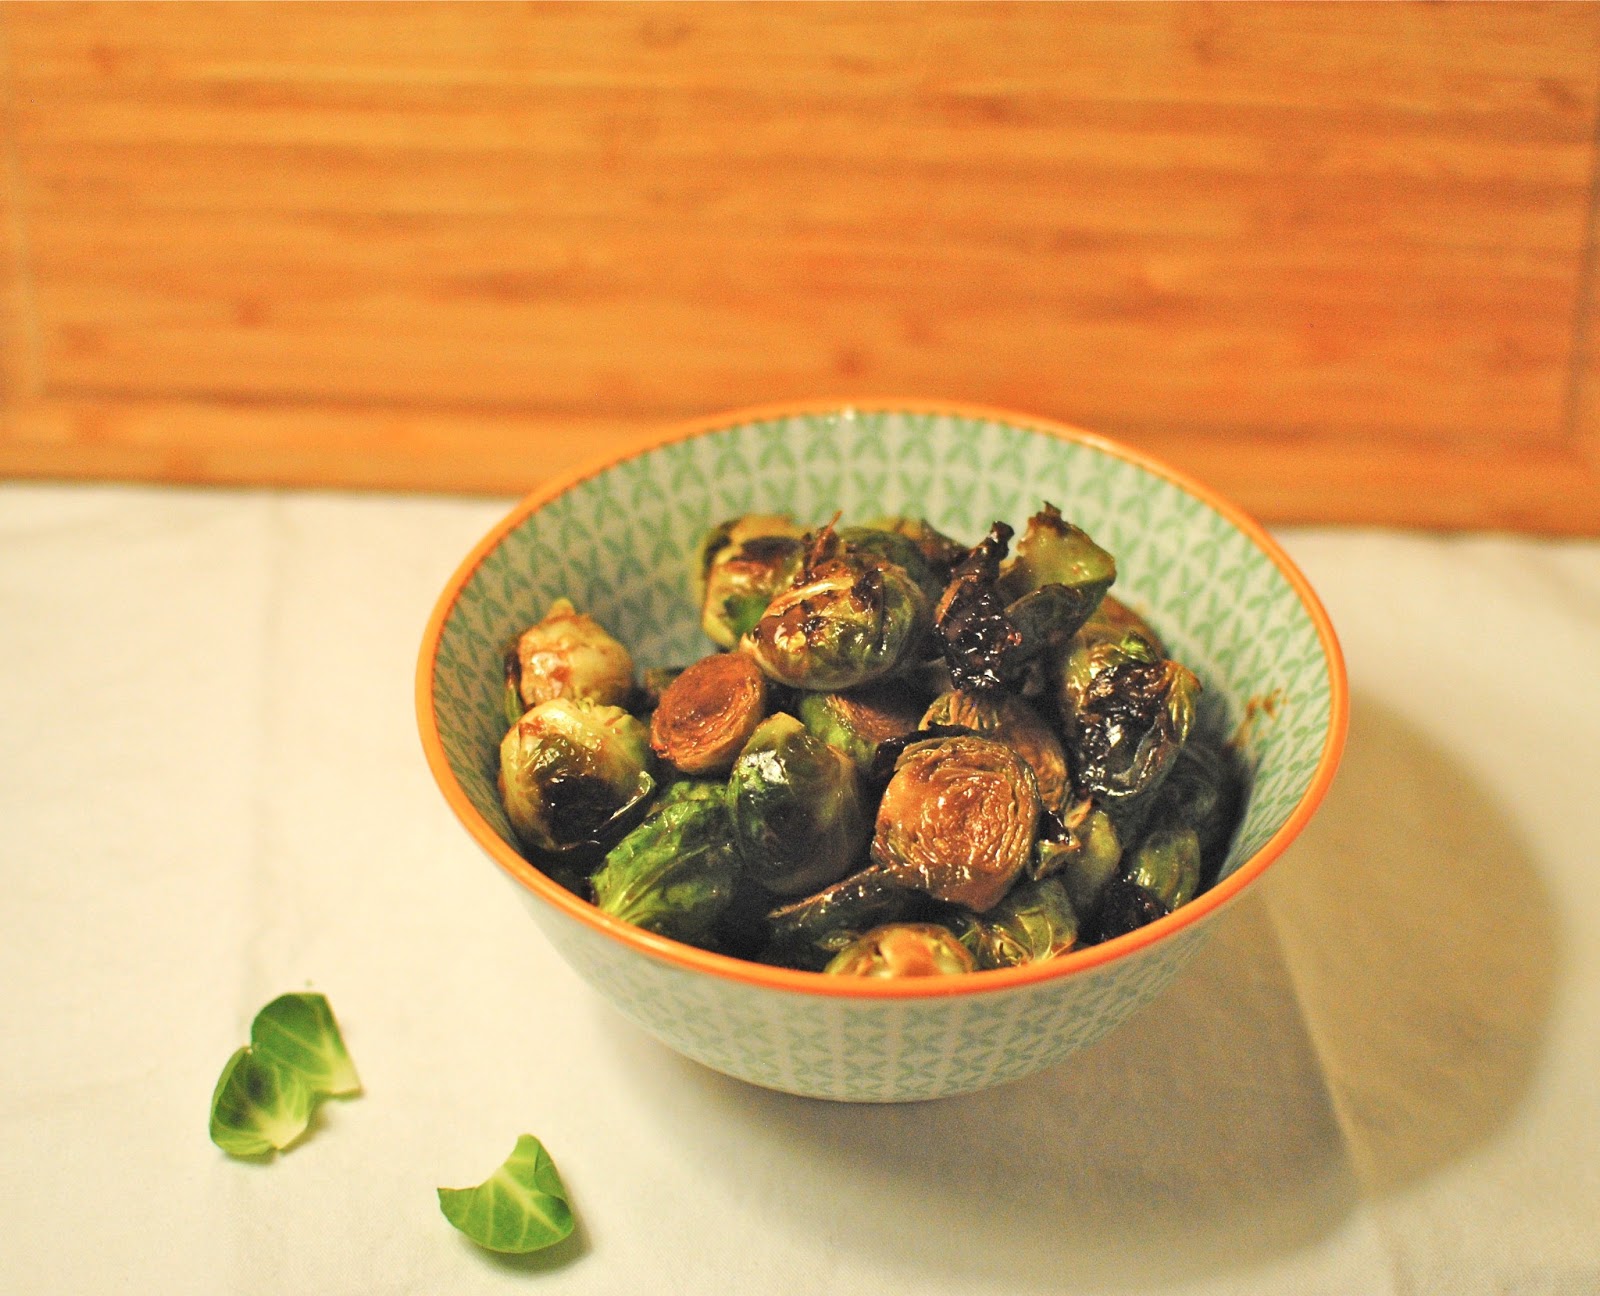
Thankfully, brussels sprouts are already beautiful.  Though these naked ones cannot hold a candle in tastiness to their "after" selves...


Yum.  Despite the bad rap b.sprouts get with small children, prepared the right way they are delectable.  This recipe combines balsamic vinegar, dijon mustard, zested garlic, and fresh thyme to a savory perfection.

   
Believe me, these are not your Grandma's boiled sprouts.  No, sir.  You're going to want to add these brussels to every dinner menu.

Check it out.

Balsamic Brussels Sprouts
Serves 2 brussels sprouts lovers (or 3 regular people)

1 pound brussels sprouts
1 1/2 tablespoons balsamic vinegar
1 tablespoon dijon mustard
1 teaspoon olive oil
1 teaspoon fresh thyme (or 1/2 teaspoon dried)
1 clove garlic

Preheat the oven to 400 degrees.  Slice the nubby ends (technical term) off of the sprouts, then slice sprouts in half.  Toss uncooked sprouts in 1 tablespoon olive oil and spread on a baking sheet.  Cook in preheated oven for 20-25 minutes, tossing once.  Remove when sprouts are beginning to brown. Mix balsamic, mustard, olive oil, and thyme.  Mince or zest garlic (my personal favorite is using a zester to get a fine zest) and add to sauce.  Toss cooked brussels sprouts in sauce and serve!


Do me a favor- just try them.


Related Posts Plugin for WordPress, Blogger...

Popular Posts

Search This Blog