This is the good stuff.


Good as in: takes 20 minutes and just a handful ingredients to create a culinary taste-explosion.  Well, explosion might be strong.  But oh my this salad is good.  Remember when I mentioned this salad, how frequently I make it, and explained that enough toppings allow this to be a whole dinner in itself, filling up the hungriest husband?  It's true.  Plus, the way I pan-roasted this salmon is hands down my favorite way to cook salmon.


Shocking revelation: it uses the cast iron skillet.  If you haven't procured one yet, here it is.  For less than $20.  Need I repeat: does not necessitate cleaning?

But again, a big thanks to the Bon Appetit pan-roasting article.  Before this, I usually cooked salmon in the oven, either on broil or just a hot temp.  That totally works, but I think the timing is just better this way.  That and I realized that salmon is meant to be eaten medium or medium-rare.  This isn't chicken, people, bright pink inside is good.


Also very important to this salad: the balsamic vinegar.  You know how 99% of balsamics have a strong acidity?  {Apparently this is due to public demand and overwhelming the market with cheap-o balsamics, but let's just not go into how weird I am and how much I read about food}  Well, this balsamic doesn't have that acidity.  None of it.  Truth.  I pour this stuff straight onto the salad, and it is amaaazing.  You can find it online, oooor you can taste test some balsamics in Whole Foods or another such lovely place that will open stuff for you.  Really good balsamic vinegar is a bit of an investment, but so so worth it in my opinion.  {In case you're not ready for the commitment, I'll also give you a balsamic vinaigrette recipe.  ok?}


This is pretty much the only other dish needed to whip up this salad: a bowl.  Did I mention the part about how it's ready in 20 minutes?  Or about how the avocado and salmon together taste kinda like sushi, which makes me infinitely happy?  Yeah, you should really give this one a try.

This recipe is for all of you who looked at the gougéres and thought "there is absolutely no way I'm making that.  And what the heck is a paddle attachment?"  Because I'm confident you can stir.  And that's all this recipe requires.

Pan-Roasted Salmon Spinach Salad
Serves 2

3/4 pound salmon (wild-caught is the best, but I just buy whatever is reasonable)
1 tablespoon oil
About 6 cups spinach (about 1/2 of 8 oz bag, which I guess would be 4 oz.  wow. me and math.)
1/2 cup pepitas (pumpkin seeds)- feel free to substitute another favorite nut
1/2 cup cherry tomatoes, halved
1/3 cup shredded parmesan
1/2 a big avocado, sliced into strips
3-4 tablespoons balsamic vinegar*

Set the oven to broil.  Scatter pepitas on a small baking sheet and place in the hot oven.  Allow to toast until you start to hear seeds popping (about 4-5 minutes).  Remove seeds from oven and preheat oven to 400.

Get the cast iron (or other ovenproof) skillet hot over medium-high heat.  Add oil.  Then place salmon skin side down into the pan.  Press down onto the salmon with a spatula to ensure crispy skin.  Allow salmon to cook on stove for 5 minutes.  Then place the whole skillet in the oven for another 5-8 minutes depending on thickness.  While the salmon is cooking, mix the spinach, tomatoes, pepitas, parmesan, and balsamic vinegar together.  Place the salad mixture onto plates, top with avocado slices, then with cooked salmon (when serving salmon, flip out of pan and over and you can remove the skin if desired- we usually do).

*If you have balsamic with a high acidity, mix 1/4 cup balsamic with 3 tablespoons olive oil and a pinch of salt and pepper.  Mix well and dress salad.  Feel free to adjust balsamic and oil amounts to your desired taste.  


Ug, making my mouth water.  Again.


I think we've established that I am pretty into cooking with my cast iron skillet.  The amount of flavors and tasty oily bits is overwhelming.


And when those flavors and oily bits come from this.  Oh man.  Yes.  Those are two New York strips being basted in rosemary and thyme and butter.  So many good decisions happening.

This recipe comes from Bon Appetit, and once I read their section on pan-roasting, I was hooked.  I love the idea of employing the ol' cast iron, getting a fabulous sear, then allowing the meat to cook in its own juices in the oven.  And as it was frigid here when we made these, I wasn't about to demand that Mr. S&S hop outside and grill.  Plus, I've always heard that steak restaurants pan-roast their steaks {in butta} and that creates the fabulousness.  {Don'tdon'tdon't forget about the butta}


You start with a flavorful rub that soaks into the steak as it sits on the counter.  Steak needs to sit out to come to room temperature before being cooked, or else it doesn't cook evenly and gets that grey, unappetizing color.  blech.  But we both know that you'll wait and get these beautiful brown steaks.


Have I mentioned that I'm not a vegetarian?  I think with steak pictures this big, it just needs to be emphasized.  Although we eat mostly chicken and fish around here.  Red meat only happens every couple of weeks.  Mr. S&S loves when those days come around.  I think he could eat a pound of red meat every day and be happy.

These steaks go very nicely with some spinach sauteed down with garlic and olive oil.  A super easy, lovely way to get your green veggies!


Pan-Roasted Steaks
Serves two hungries, adapted from Bon Appetit

For the rub:
2 tablespoons ground coffee
2 tablespoons freshly ground black pepper
2 tablespoons brown sugar
2 teaspoons smoked paprika
3/4 teaspoon chili powder

The rest:
2 10oz New York Strip steaks (or similar)
2 tablespoons canola oil
3 tablespoons butter
1 clove garlic, crushed
2 teaspoons thyme
1 teaspoon rosemary
sea salt

Mix the rub ingredients together and press into steaks.  Allow steaks to sit at room temperature for at least one hour.  Preheat oven to 400.  Then, heat a cast iron skillet with 1 tablespoon oil until oil becomes shimmery and hot.  Place steaks in skillet for one minute.  Remove and wipe excess rub/oil out of pan.  Pour the remaning 1 tablespoon oil into the skillet and allow to heat.  When oil is hot, place steaks back in the pan (on their uncooked side) for another minute.  Then add the three tablespoons of butter, garlic, and herbs.  Allow butter to melt.  When butter is melted, begin to baste the steaks in butter/herb mixture for about 1 minute per side.  Then, place the skillet in the oven for about 8 minutes (for medium rare).  Remove and check steaks to ensure their cookedness to your liking, then allow them to rest for at least 10 minutes.

Sauteed Spinach
Serves 2

3 large handfuls of spinach
2 cloves garlic, minced
1 tablespoon olive oil

Heat a non-stick pan with oil.  When oil is fairly hot, tear spinach leaves up into the pan.  Add the garlic.  Stir spinach occasionally until it wilts (about 3-5 minutes).  Serve immediately.

More pan-roasting to come!


You know those tastes from your childhood?  Not the perfect {velveeta} macaroni and cheese or homemade ice cream pie that your mother labored over, but the tastes that she intentionally tried to steer you away from and then eventually gave up and bought mass quantities of.


For me, it was chips and salsa.


For my brother, it was oreos.  Between the ages of 13-15, he probably consumed 5 million pounds of oreos.  And mom just kept buying them.  She especially enjoyed getting the oddly colored holiday ones.  So sweet {husky} {just at the time, very handsome now} brother would sit down after school each day and devour his neon orange or robin's egg blue or festive red iced oreos.  Don't you wish life was that simple now?


But I digress.  For me, I have distinct memories of killing an entire jar of salsa and bag of tostitos in one sitting. Bymyself.  No. Self. Control.  Things didn't improve much in college, except that I would purchase Trader Joe's flax seed {or something} chips and their "fresh" salsa.  A huge step up in nutrition {riiight} from tostitos restaurant style chips and medium salsa.  I am probably made of sodium at this point.


But no salsa was ever perfect.  Since my obsession has never died, I've been constantly on the lookout for the most excellent salsa.  It can't be that awful sort-of-chunky-sort-of-liquid business that comes in the low quality jars.  It has to commit: either very chunky (see fabulous pico) or very smooth.  As I'm sure you could tell from my food processor's involvement, this salsa is smooth.  It's also perfect.  Freshness from the lime and cilantro, spice from the chipotles in adobo sauce and fresh jalapeno, and depth from the roasted garlic.  Yes, please.


I also hear there's a certain sporting event coming up this weekend that might necessitate some intensely amazing salsa.  So you'd better hop on it.  I mean, let's not even try to pretend that I will be watching the Super Bowl for anything other than the commercials {when I remember...}, the super cute Harbaugh coaching face-off, and the fooooooood.

Roasted Garlic Chipotle Salsa
Makes one quart

1 head of garlic
1 28 oz can of whole tomatoes
Juice of 1 lime
3 tablespoons fresh cilantro
1 jalapeno, top sliced off
1 red onion, chopped into quarters
2-3 chipotles in adobo sauce (plus 1 tablespoon of sauce)
1 tablespoon cumin
1/2 tablespoon ground black pepper

First, to roast the garlic, slice the top (about 1/4 inch) off of a head of garlic.  Wrap the whole thing in tin foil and place in a 375 degree oven for 20 minutes.

Meanwhile, dump all the other ingredients into a food processer and whirl away!  Add the roasted garlic at the end and whirl it, too!  If you're a spice wimp, start with just the jalapeno and one chipotle with the sauce.  We ended up with at least three chipotles, and I don't find it overly spicy, but I also love spice...


Tostitos chips, however, are still my favorite.  As long as we're talking about the multigrain scoops.


Tomorrow is Saturday, which means tomorrow you should have brunch.


 Or Sunday.  Whichever weekend day is your brunch jam.  Regardless of the day, your brunch should include quiche.  Specifically this caramelized onion, sausage, cherry tomato quiche (with goat cheese and parmesan, of course).  Why?  Because sometimes scrambled eggs are just tired.  And they don't include caramelized onions.  Ok, sweeping declaration: onions should always be caramelized.


When I was studying abroad in Italy, I would buy packs of sausage and the butcher would have always tucked in a few sprigs of fresh rosemary.  Thus, I decided that sausage shall {sweeping declaration #2} always be cooked with rosemary.  Because I will always defer in food knowledge to an Italian, especially an Italian butcher.  


And goat cheese is never a wrong choice.  {Apparently I am living in declarations today}.  So with all this goodness together- how could you go wrong?  Picture it: this quiche alongside a stack of pancakes or cinnamon rolls and a big steaming mug of coffee.  {Ok, fresh fruit too}. Saturday is just the best.


Sausage, Caramelized Onion, and Cherry Tomato Quiche
Serves 4

1 pie crust, I use pillsbury
1/4 cup cherry tomatoes, quartered or halved depending on size
3/4 pound of sausage, I always use spicy (I also cook the whole pound, because that's how it's usually packaged, then save the rest for scrambled eggs later)
1 whole onion, sliced
1 tablespoon rosemary
3 tablespoons goat cheese
2 tablespoons grated parmesan
3 eggs and milk to make 1 3/4 cups when measured with the eggs

Preheat the oven to 375 and roll the pie crust out into a pie pan.  Bring a cast iron skillet (or other pan) to medium heat with oil and begin to caramelized the onions.  Stir onions frequently to prevent burning.  When the onions are mostly cooked (about 10 minutes, when they are light brown and slightly wiggly), add in the sausage and rosemary and brown.  When everything is cooked, pour onions and sausage into the pie crust.  Then evenly distribute the tomatoes and goat cheese ove the top.  Crack the eggs into a 2 cup measuring cup and mix into a scramble.  Add milk to the measuring cup until the mixture measures 1 3/4 cup.  Stir again.  Pour egg/milk mixture over the ingredients in the pie pan.  Sprinkle parmesan on top.  Bake for 45 minutes or until the eggs are set and crust is brown.


Mmmm, brunchbruchbrunch.  Is it Saturday yet?


I might have mentioned that I'm in my last semester of graduate school for counseling.  Graduation is near, thank goodness, but also near: Quit Day.

This last semester of mine includes an addictions class, in which we must Quit something.  Something meaningful, something tough, something that makes us realize {in some small way} how rough it is for our clients.  Oh, and did I mention, it's for THREE months.  This isn't just lent-giving-up-something-small, this is Quitting {with a capital Q} and having a sponsor {classmate} whom I will inevitably text pictures of baked goods to in the middle of the night.  Because yes, I have chosen to quit sugar.  The thought process was long, since I rather enjoy all of my vices: caffeine, carbs, alcohol, and online television {Netflix, I could never quit you}.  So sugar it is, in hopes that it will help me be healthier and make better food decisions {like not eating random donuts just because they're sitting on a table near me} {oh no, donuts, I miss you already}.  I'm allowing myself honey to sweeten things, and I'm not going crazy with small amounts of sugar in restaurant food {who really knows what's in there anyway} and packaged food.  I'm allowing packaged things if sugar is not in one of the first 2-3 ingredients.


Needless to say, my last few days before Quit day included chocolate fondue, very sweet tea, and eating most of my chocolate stash in the pantry.  I am the picture of self-control.  ha.  But along this process, I hope to let you know once or twice how it's going {just for research sake}, and I hope to give you a few examples of desserts that don't include sugar.  Don't worry, I already found these that I'll be trying out soon.  Medjool dates, you sound lovely and exotic, let's be friends.  So please don't quit ol' Sparkle & Stir in her earliest stages, because butter and cheese are definitely still allowed.


There's a deep part of me that longs for the days when meal times were more formal, when people got dressed up for dinner (instead of changing out of work clothes into leggings and a husband shirt.  guilty.) and when there were extra food gatherings.  An era when events like tea time and cocktail hour still happened!  I guess to make that really work, I'd need more servants.  At least that's what Downton has taught me.

But in the evenings when I like to pretend we still live in that time, I round up Mr. S&S, put a tasty drink in his hand and present a unique hor d'oeuvre (or, let's be real, a bowl of cashews).  Something like this very fancy sounding gougére.


They're really just french cheese puffs.

But light and airy cheese puffs, perfect with white wine, champagne, or sparkling water.


To make a batch takes only 10 minutes, and then you can freeze all the extras.  They go straight from the freezer to the oven and take about 25 minutes to bake.  How impressed would your impromptu guests (Lord and Lady Grantham, of course) be to see a lovely arrangement of warm, buttery puffs?  Probably just as impressed as Mr. S&S is when I obnoxiously over-pronounce gougéres.  I would also bet that I'm not even pronouncing it correctly.  But when in doubt, just say it louder!


Of course with a leisurely cocktail hour and beautiful hor d'oeuvre, I'm off the hook for a dinner taking any longer than 30 minutes to prepare.  Salad it is!

But tote these along to your next potluck occasion, and I can guarantee you'll get impressed looks.  Also guaranteed are a lot of questions about whether these are like Red Lobster cheddar biscuits.  The answer: only if you need them to be.

Gougéres aka French Cheese Puffs
Makes about 30 puffs, more if you make them smaller than I did
From Around My French Table by Dorie Greenspan

1/2 cup milk
1/2 cup water
8 tablespoons (1 stick) unsalted butter, cut into 4 pieces
1/2 teaspoon salt
1 cup all-purpose flour
5 large eggs
1 1/2 cups coarsely grated cheese (Gruyére or sharp cheddar)

Preheat the oven to 375 and line two baking sheets with silicone mats or parchment paper.  Bring the milk, water, butter, and salt to a rapid boil in a medium saucepan over high heat.  Add the flour all at once, lower the heat to medium-low, and immediately start stirring.  The dough will come together.  Keep stirring (with vigor) for another minute or two to dry the dough.

Turn the dough into the bowl of a mixer fitted with the paddle attachment (or a bowl you can mix with a wooden spoon or hand mixer).  Let the dough sit for a minute to cool, then add the eggs one by one, allowing each one to be incorporated into the dough before adding the next.  Then beat in the cheese.  Once the dough is made, it should be spooned out immediately onto baking sheets, about 1 tablespoon of dough per puff. If you would like to freeze some, place the baking sheet in the freezer, then later place the frozen puffs into a freezer bag. Frozen gougéres just need a minute or two more in the oven, and no defrosting!

Bake for 12 minutes, then rotate the pan and bake for another 12-15 minutes until the gougéres are golden, firm, and puffed.  Serve warm.


I'm so classy you can't stand it, huh?


Over the past few weeks, meal planning has been a hot topic of conversation.  {Wow, don't you want to be my friend now?  What juicy tidbits might we exchange?  Meal Plans!  No, I promise I'm cooler than that.  Maybe.}  One friend has a spreadsheet with a three week rotation of meals, so she knows exactly what ingredients to purchase, and she and her husband don't get bored.  Another friend's fiance works late frequently, so they improvise and will run to Whole Foods to hit up the salad bar or trade off making late night dinners.  I think each person has their own technique for meal planning (or lack of planning), but as I post all of these meals and recipes, I thought I'd share mine!


First, I post my meal successes here.  But on the days we're not eating beautiful fajitas or pan-roasted New York strips (oh yeah, get ready), we eat hot dogs or popcorn or whatever I can make out of the scraps in the fridge.  Those are usually loosely called "Asian" because I cover it in soy sauce and sriracha (which took me five minutes to spell and will take a lifetime to pronounce).  Basically, half the nights of the week I'm stretched out on the couch after work completely unmotivated except that I already meal planned!  So I have to use the ingredients!  Whew.


That being said, I try to plan meals for at least 4 nights at one time.  Ideally I'll plan a whole week and shop all at once and not again, but things aren't always so picturesque.  But having that meal plan when I'm exhausted after a long day saves us from eating pasta every night.


I start by checking out the specials from the grocery stores I frequent.  I shop mainly at Harris Teeter, then at Trader Joe's and Fresh Market.  I much prefer the latter two, but real life means more groceries that TJ's carries and less costly than FM.  Harris Teeter sends out their weekly specials in an email, which I scour for seafood/poultry and produce that looks tasty and like a good deal.  I base most of our meals around those specials, for instance this week wild salmon and tilapia were on sale, so we had salmon spinach salads and fish tacos for two of our dinners.  We only eat red meat occasionally, and I try to buy it all at Fresh Market since it tastes SO much better.  FM also sends out specials each Tuesday and now Saturday- so I plan around those as well.  Trader Joe's also has some great frozen items that are fantastic in a pinch: I get their frozen mahi mahi in soy ginger marinade and put it over quinoa with sauteed spinach or roasted asparagus, and it's great!  Quick, too.  I can get behind some three ingredient meals.


After I check out the ingredient options, I usually go to Tasty Kitchen and search the recipes by the ingredient I like and their rating system.  I also read quite a few food blogs that inspire me (check out the blogroll!), so between the two I get an idea of what we might eat.  Mr. S&S gets to make requests, too, but they don't always make the cut...  If he got to pick, we'd eat almost entirely foods that don't have to be chewed: mashed potatoes, creamed corn, pot pie... :)  I also try to incorporate two veggies in each meal, with at least one being green: spinach, brussels sprouts, and asparagus are a couple favorites.

Here are a few ideas of basics that I change up and make pretty frequently:
  • Spinach salad with chicken or salmon, cheese, nuts, fruit, and balsamic vinaigrette (enough toppings and it fills up even the hungriest husband)
  • Tacos!  Not the tacos of my childhood with the taco kit and hard shells (one was inevitably broken and therefore threw off all the shells per person ratios. fights ensued.) and ground beef with packet seasoning, but with fish or chicken and a plethora of toppings like avocado, sliced radishes, feta or goat cheese, homemade salsa, and black beans
  • Pizza: wheat crust with veggies, fruit, different meats, and cheese- red sauce optional, because olive oil compliments pizzas with unusual toppings like fruit
  • Grain bowls: quinoa, brown rice, or another grain with veggies, a good sauce, and a meat
  • Fish, roasted green veggie, and roasted sweet potatoes or other grain

All said, I can have our week of meals planned in 30-45 minutes, which sounds like a long time, but can totally be done while watching the bachelor.  But not while watching Downton {looking at your no commercials, PBS} Hopefully I'll be sharing more easy, tasty meals with you on Sparkle & Stir, but for now I wanted to give you an idea of my meal planning thought process!

What do you think?  How do you plan meals?  Are you a compulsive, spreadsheet planner or a spontaneous, day-of inspiration cook?  I'd love to hear!


This is how.


See?  You're hungry aren't you?  And those happy, chocolate chip memories are just bubbling up.  Like how for several birthdays in a row, you asked not for cake, but for chewy, crispy, buttery chocolate chip cookies.  And whenever you go to a pot luck and there's a plate of chocolate chip cookies, you first slyly inspect it to see whether they look homemade or package made.  Because there is no sense in wasting calories on the package ones.  

Wait... it that just me?


There also might have been a time when I was visiting my brother at college, and I made 4 dozen chocolate chip cookies to give to the girls I was staying with.  Because I think first impressions are best made from behind a haze of butter and chocolate.  Don't you?  Yeah, that's why we're friends.  Those awesome college girls also decided to befriend high school me.  It might have all been a ploy to check me out for their sorority, but hey, either way, we bonded.  

Ok, so we can all probably wax poetically about chocolate chip cookies, but why would I post a recipe that Tollhouse perfected eons ago?  Because this is just a bit different, in a very important way.  Two words: Brown. Butter.


If you're up on your food blogs, you'll have seen brown butter everywhere: in pasta, cakes, pulled pork, and a host of other places it only questionably belongs.  But it absolutely belongs here.

Browning butter is a pretty simple activity, though it requires some watchfulness.  Basically, you melt butter and whisk it around while it looks like above.  After about 2 minutes, it begins to develop a brown... fuzz.  Or particles.  Yeah, that sounds gross.  Something like this:


I could just say that it turns brown, but how helpful is that?  When it develops brown-ness (better?), pull it off the heat right away, but keep stirring for 30 more seconds.  When it's mixed with sugar, it smells like caramel.  Swoon.  Browning the butter gives the cookies more depth of flavor.


From there on out, it's a pretty simple procedure.  Also, this recipe only makes 24-30 cookies, which is half the usual amount.  Because it's just the two of us over here, and Mr. S&S is already my friend.  Established friendship means that neither of us needs to eat 30 cookies in one sitting.  Just 12.  It's called self-control, people.


You deserve these.  Right, friend?

Brown Butter Chocolate Chip Cookies
Makes 24-30, but is easily doubled for maximum friend-making
Adapted from Tollhouse 

1 stick of butter, browned (also a great tutorial here)
1/2 cup white sugar
1/4 cup brown sugar, packed
1/2 teaspoon vanilla
1 egg
1 1/8 cup flour
1/2 teaspoon baking soda
1/2 teaspoon cinnamon
1/2 teaspoon salt
1 cup chocolate chips
A couple of pinches sea salt for topping (optional)

Preheat the oven to 375 and brown butter according to directions.  Set butter aside to let cool, and mix flour, cinnamon, baking soda, and salt in a small bowl.  In a large bowl, mix together butter, the sugars, and vanilla.  Beat in the egg.  Add the flour mixture to the wet mixture and combine.  Finally, stir in the chocolate chips.

Using about 1-2 tablespoons batter per cookie, scoop dough onto cookie sheets.  Sprinkle a tiny bit of sea salt over each dough ball.  Bake for 9-11 minutes.  Let cookies rest on cookie sheet for 1 minute, then transfer to cooling rack.


You're also your own friend.  Remember that.


Snow!!  Last night about 8pm, after 7 daaaaays of rain, it started snowing!  I would guess this kind of snow comes to this area about once a year, so today is a pretty big day.  And, because we're in the South and equipment such as snow plows is utterly redundant, 2 inches of snow stops everything.  Which means... it's a snow day!  


I grew up even further south than this, so I didn't have a single snow day growing up.  Plenty of hurricane days, but those are far more menacing.  Snow days as an adult are excellent!  


I actually had to go out and take these pictures about 8 because I knew it would all start to melt.  Yep, it's all sliding off the trees outside my windows now.

But on to very important plans: My Snow Day Agenda.

1. Snow day calls for something sweet, like hot chocolate and cookies.  So that's gunna happen.  I have a special cookie recipe in mind, which will hopefully make it here very soon.

2. Watch the drive thru youtube... again.  The first time I saw it, we were in public.  I laughed so loudly that Mr. S&S was quite embarrassed.

3. Snuggle this buddy:


Although he needs very little help in making himself comfortable.

4. See a movie!  The choices are Zero Dark Thirty or Les Mis- thoughts?  Have you seen either?  

5. Read a... textbook.  One semester left!  But those texts won't read themselves.  By the way, any good suggestions for fiction you've read lately?  I swing by the library about once a week and need some non-textbook relief in my life.

6. Let's be real.  I'm going to catch up on Scandal today.  It's just too addictive.  

7. Figure out about 15,744 more ways to use chipotles in adobo sauce.  Everything about them is perfect: spicy, smoky, salty, and mostly used in tex-mex dishes.  

Yeah, lists of 7 things are awkward, but that's just what's happening today.  Because it's a snow day!!


I love how organized I am. 


Like how in my recipes folder I have saved three different banana bread recipes as "Go to banana bread," "best banana bread," and "better banana bread."  Is the best one better than the better one?  Is the go to one better than both?  Or is "best banana bread" actually the best?  Gaaaa.


I also might have washed a load of laundry, switched it to the dryer, then forgotten about the clean, dry clothes for THREE DAYS.  And then when I remembered and opened the dryer, I was all mad at the clothes like it was their fault for being so wrinkled.  Someone, help.  Maybe I need to hire that personal organizer contestant on the Bachelor.  I'm sure she's super sane.  No control issues there.


After debating for 10 full minutes about which banana bread recipe was probably the most wonderfulest, I landed on the go to one.  Probably because you only use one bowl to make it.  And then I turned it into a cake.  Topped with caramelized bananas based on bananas foster.  Whoa, girl.


I used my springform pan for this cake because I love that a) it is a happy green b) it makes the cake so easy to remove, and c) it is theoretically easier to wash... or to stare at contemplating washing and then walking away like something really important elsewhere in the house needs to get done.  Like ignoring laundry.  However, you can use a regular cake pan, just increase the baking time a bit if you use an 8in round rather than a 9in, which my springform is.


Yep, it's that good.


Also, we live in the South.  The weather this morning read: 4 to 6 inch snow accumulation expected overnight.  Eeek!!  You know what that means, right?  SNOW DAY!!  Come on, snow, you can do it! There is nothing that makes me feel more like a fourth grader than disproportionate excitement over getting to stay home from work/school.  Let's drink hot chocolate, watch movies, and play in the snow!

This would be a perfect snow day cake.

Bananas Foster Cake
Makes 1 9in round cake

For the cake:
3 very ripe bananas
1/3 cup melted butter
3/4 cup sugar
1 egg, beaten
1 tsp vanilla
1/2 tsp cinnamon
1 tsp baking soda
1 1/2 cup flour

For the topping:
2 regular (not overly ripe) bananas, sliced into small rounds
1/2 cup brown sugar
5 tablespoons butter

Pre-heat the oven to 350 degrees.  In a large bowl, mash bananas, then stir in melted butter.  Add sugar, egg, and vanilla and mix.  Sprinkle cinnamon and baking soda over mixture, then add flour and stir until just combined.  Don't over-stir or cake will become tough.  Pour batter into a greased pan and bake for 30 minutes, or until a toothpick inserted comes out clean.  Allow cake to cool.

Just before serving, create the bananas foster topping.  Heat a non-stick pan to medium-high heat and melt the butter.  Once butter is completely melted, add in brown sugar.  Stir sugar into butter and allow to heat until the mixture is bubbly.  Then add in bananas.  Stir mixture for about 1 minute, or until the bananas are brown but not falling apart.  Pour topping over the cake and serve!


It really, really better to snow tonight.  


While I love the idea of a 3-in-1 avocado tool,  a pancake squirter, a cherry-olive pitter, and a pineapple slicer, I just don't have the space for those items.  Or the memory to recall which beautiful, single-use items I have for specific jobs.  With kitchen tools, I just keep coming back to the same few basics.
For me, simple tools that can do multiple jobs win.  And that's why my list of kitchen tool essentials is just that: essentials.  Feel free to add the avocado thingy and pancake squirter for your own kitchen.  

1. Bodum Bamboo Utensil Set
I love these bamboo guys.  These are practically the only utensils I use when I cook.  They are light and a smooth texture to hold, clean easily, and can be used on non-stick pans.  I think the whole set is $20, and it's so worth it!  Bamboo is also a very eco-friendly wood :)

2. Lemon juicer
This tool seems to fly in the face of my "no one use items" policy.  But I cook with lots of lemon and lime juice.  Tons of it.  And this juicer is very easy to use.

3. Microplane zester
This tool is not just a zester (along I love a good bit of lemon or orange zest in salad dressings).  It will also finely grate cheese, and my personal favorite function: mince garlic.  For recipes that call for fresh minced garlic (like brushetta) this guy does an amazing job.  The garlic gets minced so finely that there are no huge offending chunks, just the breath-destroying garlic essence.

4. Measuring cups
Essential for baking.  Or measuring your dog's food. Don't forget about teaspoon/tablespoon measuring spoons, too.

5. Oxo angled measuring cups
These angled cups are so helpful when measuring liquids.  I have multiple sizes of glass and plastic measuring cups, and I use them all.  Especially that little one.  It measures in tablespoons and ounces, which is fantastic for marinades, sauces, and salad dressing measuring.

6. Tongs
These are great for cooking meat and scooping veggies.  Very basic, but very helpful

7. Plastic spatula
Again, super basic.  I probably only really use one, but having a tiny version is also nice for getting little bits out of small containers.  It's also nice to have one that can withstand very high heats for use in cooking.

8. Metal spatula (fish spatula)
If you enjoy cooking fish, this tool is so handy.  But it also helps for jobs like removing cookies from a baking sheet.

9. Ladle
Very necessary for soup serving.

10.  Pasta scoop
Very necessary for pasta serving.

11. Flat slotted plastic spatula
I use this spatula for cooking pancakes, frying eggs, serving roasted veggies and much more.  Plastic means it can be used on non-stick pots and pans.

Several items are omitted because I use them less frequently, but also think about adding: a can opener, pizza cutter, wine opener, peeler, potato masher, and whisk.  Knives will come in their own post.

Please let me know what you think of the lists or if you have any specific questions!  More to come!


On this blogging journey, I've already learned so much.  Playing with templates, figuring out aggregate websites, developing my photography, and best of all- creating recipes!  As I twirl around the kitchen in search of the perfect spice or addition to a dish, I smile to myself.  This is joy.


What has been a challenge is figuring out how to convey to you the beauty of these recipes.  I work/go to school during the day, which means that when I'm cooking and photographing, there's no natural light!  So tonight's journey was not just in perfecting a recipe, but playing with photography and lighting.  Therefore, our before and after shoot.  With brussels sprouts.  Which is totally normal, right?


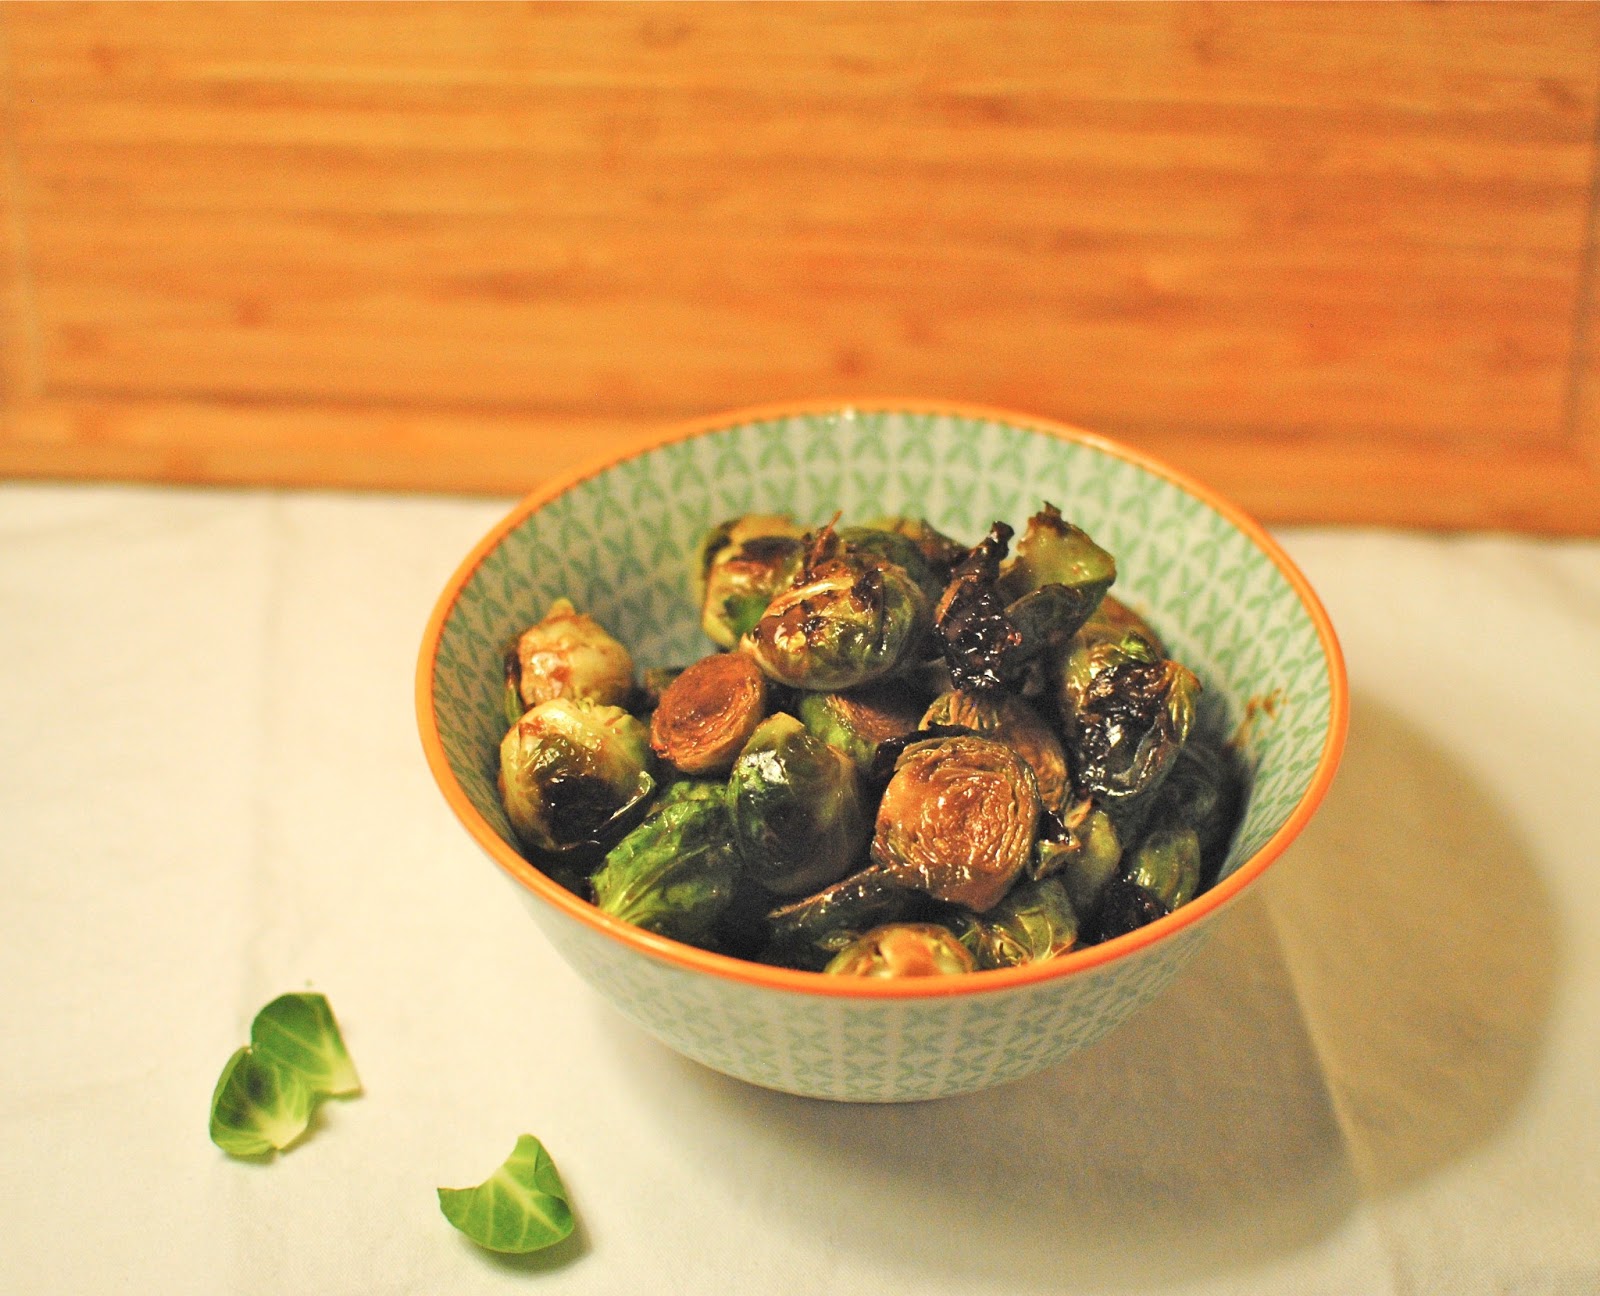
Thankfully, brussels sprouts are already beautiful.  Though these naked ones cannot hold a candle in tastiness to their "after" selves...


Yum.  Despite the bad rap b.sprouts get with small children, prepared the right way they are delectable.  This recipe combines balsamic vinegar, dijon mustard, zested garlic, and fresh thyme to a savory perfection.

   
Believe me, these are not your Grandma's boiled sprouts.  No, sir.  You're going to want to add these brussels to every dinner menu.

Check it out.

Balsamic Brussels Sprouts
Serves 2 brussels sprouts lovers (or 3 regular people)

1 pound brussels sprouts
1 1/2 tablespoons balsamic vinegar
1 tablespoon dijon mustard
1 teaspoon olive oil
1 teaspoon fresh thyme (or 1/2 teaspoon dried)
1 clove garlic

Preheat the oven to 400 degrees.  Slice the nubby ends (technical term) off of the sprouts, then slice sprouts in half.  Toss uncooked sprouts in 1 tablespoon olive oil and spread on a baking sheet.  Cook in preheated oven for 20-25 minutes, tossing once.  Remove when sprouts are beginning to brown. Mix balsamic, mustard, olive oil, and thyme.  Mince or zest garlic (my personal favorite is using a zester to get a fine zest) and add to sauce.  Toss cooked brussels sprouts in sauce and serve!


Do me a favor- just try them.


Related Posts Plugin for WordPress, Blogger...

Popular Posts

Search This Blog